 |
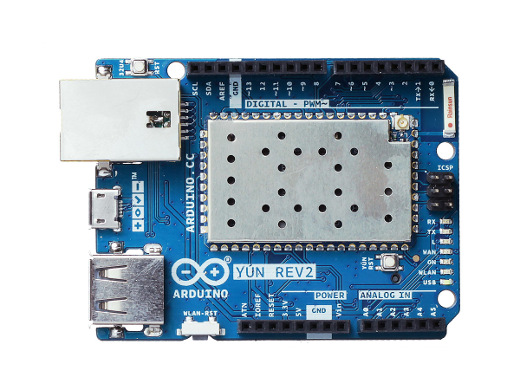
The Arduino Yún (Yún which means "cloud" in Mandarin) is unusual in that it combines what is effectively a 16MHz Arduino Leonardo microcontroller with an Atheros AR9331, a 400MHz microprocessor running OpenWrt (a version of Linux), so it's a bit like a combination of an Arduino and a Raspberry Pi on one board the size of the Arduino Uno.
I was interested in [connecting the Yun to a motor shield or a Zumo, so I contacted Adafruit, Arduino.cc and Pololu, the latter makes the Zumo to get some help.
Here's some miscellaneous notes regarding the Yún.
OS Installation Notes#
Despite being a 400MHz processor and being connected directly via an ethernet cable, it is good to remember that the AR9331 on the Yún is still quite a small computer. It's not as fast as a Raspberry Pi (a Pi 3 B+ runs at 1.1GHz) and you can run out of memory (and need to reboot) sometimes.
Once you've connected the Yún to your network via an ethernet cable (WiFi comes later) you upload the "YunFirstConfig" sketch using the Arduino IDE. Then open the serial console, and you'll be presented with some questions, including your WiFi network name, network password, the name and Linux password for your Yún. Then you can log into the Yún via a web browser and further configure it.
There's also a YunSerialTerminal sketch which permits you to open a console directly to the Yún from the Arduino IDE's serial monitor. There's a single line at the top of the monitor and a "Send" button — not quite a normal terminal experience but it works. Once the Yún is available on your WiFi network you can just remotely connect to it using ssh.
 $ ssh root@192.168.1.73
 root@192.168.1.73's password: •••••••
 BusyBox v1.28.3 () built-in shell (ash)

  _______                     ________        __
 |       |.-----.-----.-----.|  |  |  |.----.|  |_
 |   -   ||  _  |  -__|     ||  |  |  ||   _||   _|
 |_______||   __|_____|__|__||________||__|  |____|
          |__| W I R E L E S S   F R E E D O M
 -----------------------------------------------------
 LEDEYun 17.11, r6773+1-8dd3a6e
 -----------------------------------------------------
root@yun:~#
You use the opkg page manager rather than apt on Debian systems. The package names on OpenWrt are slightly different than Debian or other Linux flavours, so you might have to use opkg find name to find a software package (or look on the OpenWrt website for clues). You can install either python3 (the full package) or python3-light, which aims to provide most of what people need, and then just install the python3 subpackages as necessary. On a computer as small as a Yún you generally want to save as much space as possible. It wasn't an issue for me because I expanded the Yún's native drive space with a 32GB SD card (this is highly recommended, link below).
Once logged in via ssh here's what I did (abridged version):
 # opkg update -y
 # opkg install tcsh blkid vim-full vim-runtime
 # opkg install python3-light
 # opkg install python3-pip
The tcsh is just a personal preference, rather than using the native bash shell. With the customised prompt (below) I get a nice colorful prompt. And yes, it's possible to do this with bash, but tcsh has a lot of nice features that I'm accustomed to. The blkid was used for setting up a swap memory space but is otherwise unnecessary. vim-full replaces the very-minimal version of the vi editor already included.
The Yún comes with Python 2 but I want to use Python 3, so I installed Python3 and the python package installer program pip3. The python3 package installs the entirety of Python 3, so it seems python3-light is meant to generally suffice for most people. Based on the difference in install times, it's significantly smaller. Install pip3, upgrading the setuptools, smbus2 (for I²C support), etc.:
 # pip3 install --upgrade setuptools
 # pip3 install smbus2
 # pip3 install python3-yaml
When installing git you'll also need ca-bundle in order to be able to handle https: URLs.
# opkg install ca-bundle git git-httpAfter that you should be able to perform a git clone successfully.
Important#
- One thing to note is that you **must** do an opkg update prior to installing any software because the package lists are hardwired into the Yún's firmware, so until you do the update it won't know about any additional packages. For example, after a reboot opkg find tcsh will return an empty line, but after the update it will find the package as normal.
- If you're going to expand the filesystem onto an SD card, do that before you install any software, as the process requires most of the available disk space to execute the expansion sketch. Once expanded you'll have plenty of space.
- When expanding the filesystem you'll be asked the size of the data partition in MB. This is the size of the partition used for the OS, with the rest of the SD card used for your applications and data. I used a 32MB SD card so I set the data partition to 1000 (1GB) leaving about 30GB of space for my workspace. Once you've done the partitioning the expansion sketch will run again, asking you to proceed. Unless you like getting into infinite loops just say "no".
Tcsh changes#
I have a personal preference for tcsh. Once installed I include these three files in the home directory (/root) for configuration:
.cshrc#
#!/bin/tcsh

set path = ( \
    . \
    ~/bin \
    /usr/sbin \
    /usr/bin \
    /sbin \
    /bin )

if ( -f ~/.aliases ) source ~/.aliases
if ( -f ~/.prompt ) source ~/.prompt

umask 022
.aliases#
alias ls '/bin/ls --color=auto'
alias lsa 'ls -alF'
alias h 'history'
alias c 'clear'
alias u 'cd ..'
alias uu 'cd ..;cd ..'
alias uuu 'cd ..;cd ..;cd ..'
alias uuuu 'cd ..;cd ..;cd ..;cd ..'
alias uuuuu 'cd ..;cd ..;cd ..;cd ..;cd ..'
alias pud 'pushd'
alias pod 'popd'
alias rsrc 'source /root/.cshrc'
.prompt#
#!/bin/tcsh
if ( $?tcsh ) then
    # tcsh-specific commands:
    set prompt="\
 %{\033[3;32m%}[\!]%B %m: %b %{\033[35m%} %/%}\
 %{\033[0;37m%}...%{\033[0m%} "
endif
References#
- Getting Started with the Arduino Yún Rev. 2
- Let’s explore Arduino Yún’s unique features – Hardware review
- Can I reset Yun by SW?
- How to expand the Yún disk space
- Re: Shuttoff or shutdown
- Running out of memory on yun rev 2 while trying to install sdk tells how to "increase available memory" by adding swap space
- OpenWrt Project home page